Free Pinterest Tutorial Sign up & Set up for FREE Business account
HOW TO SIGN UP FOR A FREE PINTEREST BUSINESS ACCOUNT:
First, why is a business account better than a personal account?
Personal and business accounts on Pinterest are similar, but business accounts include features that are helpful to business owners and marketers. This includes access to the Pinterest Business Hub and Pinterest Analytics, where you can review analytics for your Pins.
Business accounts also give advertisers and merchants the ability to create Idea ads, video ads, carousels, collections ads, product catalogues and more.
So, for anyone wishing to use Pinterest to drive traffic to websites, links, products, or services then the FREE business account is what you need.
SIGN UP (Unless you already have a personal account)
Head over to https://pinterest.com (this will change automatically to the country you are in), once there you will see TOP RIGHT “Log in” and next to this you will see “Sign up”, click sign up as in screenshot below.
NOTE: If you already have a Pinterest “Personal Account” then just click the Log in button. Once logged in you can then change your personal account to a business one shown later in this tutorial.

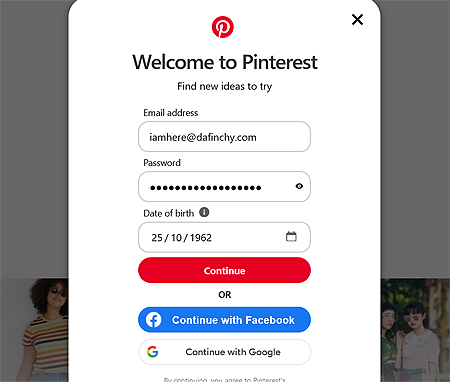
This will open a pop-up screen asking how you wish to sign up, “email”, “Social media” or “Google”, for this example we are using “email” to sign up.
This is the main “Sign Up”, pop-up screen.
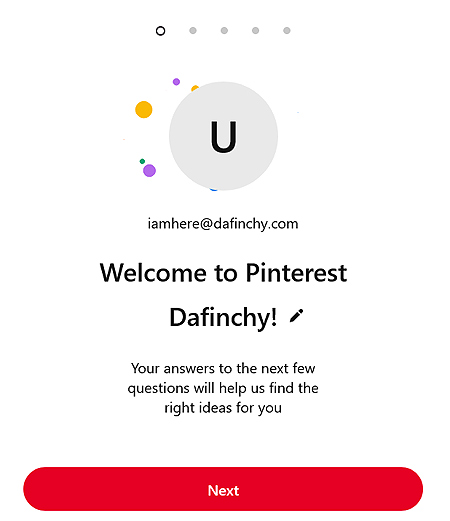
NEXT: FILLING IN SECTIONS AFTER THE WELCOME SCREEN, shown below.
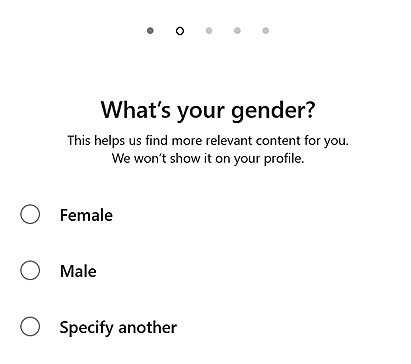
NEXT SCREEN: CHOOSE YOUR GENDER:
Simple make a choice here then click “Next”.
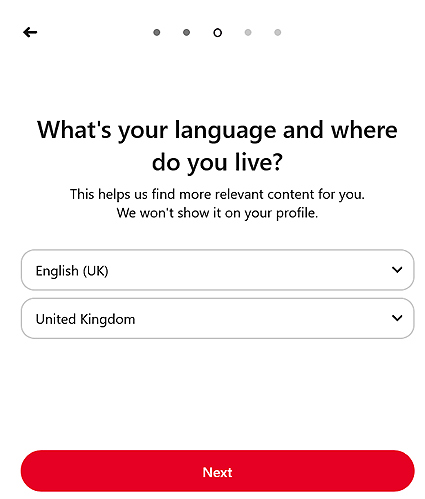
NEXT: CHOOSE YOUR LANGUAGE & LOCATION (Country).
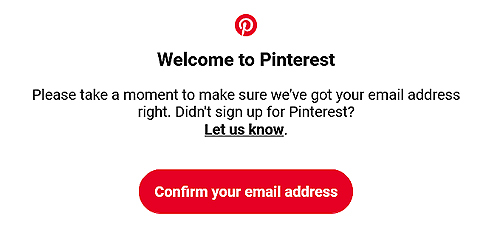
EMAIL CONFIRMATION: This is IMPORTANT!
If you haven’t already head over to your email account (This can be done the minute straight after you sign up), or it can be done once you have finished signing up, without confirmation certain functions will be locked out until you do, the email will look something like the screenshot.
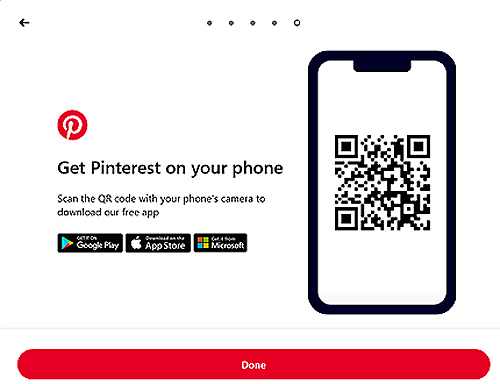
NEXT: THE DONE SCREEN:
Simply click the “Done” button as in the screenshot.
NEXT: CONVERTING THE PERSONAL ACCOUNT (Just set up) to A BUSINESS ACCOUNT:
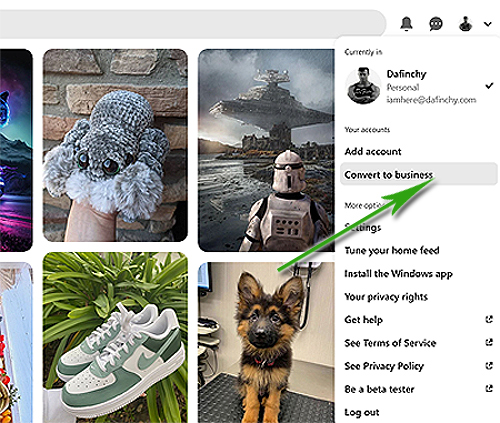
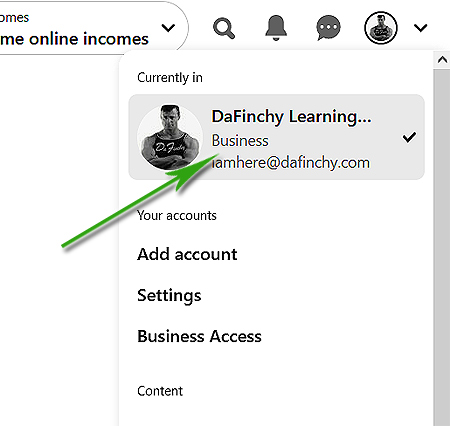
Once all the above has been completed you should now be on the “Home screen”, top right of this screen you will now see your new account represented by an icon and next to this you will see a drop-down arrow, click this as in screenshot.
NEXT: Click the “Convert to Business” button to start converting to a business account as shown in the screenshot above.
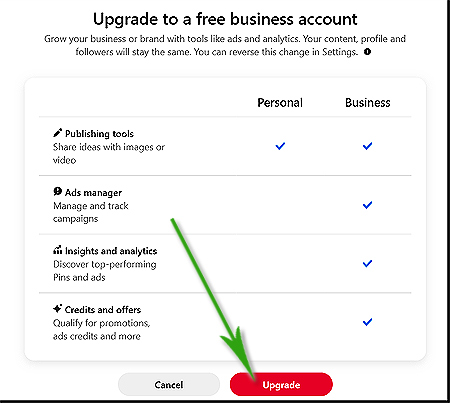
This will take you to the “Upgrade to a FREE business account” page.
NEXT: UPGRADE TO A FREE BUSINESS ACCOUNT SECTIONS:
In the following screenshot you will see the “Upgrade to a FREE business account” section.
Click on the red “Upgrade” button to continue.
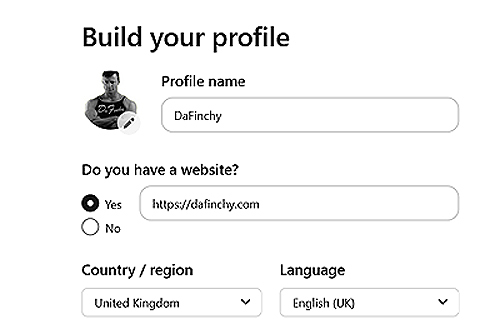
NEXT: BUILD YOUR PROFILE PAGES:
Please choose a “Profile name”, if the name is taken the system will let you know, next it asks, “Do you have a website?”, if you do or have some other platform (a shop etc) then place the link in here. Don’t worry if you don’t as this can be filled in later, so click the “NO” section.
Make sure you check that the “Country/Region” and “Language” are correct then click next.
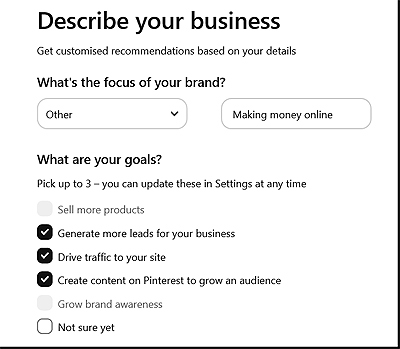
NEXT: DESCRIBE YOUR BUSINESS SECTION:
Under the section that says “What’s the focus of your brand” I would suggest you choose “Other” then type a short description in the box provided as I have in the following screenshot.
In the “What are your goals?” section you can choose up to 3, but I suggest choosing all 3 as I have done here. If you aren’t sure just click “Not sure yet”. Click “Next” then continue filling in the “Describe your business”.
The 2nd screenshot here you can choose “not sure” but I would recommend “Online retail or marketplace” option. Click “Next”.

NEXT: TELL US MORE SECTION:
Here (if you have any) you can choose to connect to either online shop/stores such as Etsy, Shopify, woocommerce (WordPress website shop) etc so just click the ones that apply, if you don’t have ay you can click the “Something else” button as in my screenshot, then click “next”.

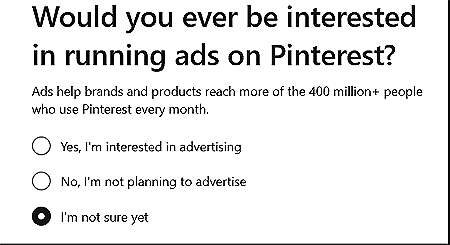
NEXT: WOULD YOU EVER BE INTERESTED IN RUNNING ADS ON PINTEREST?
Here you can choose “yes”, “no” or as I have done “I’m not sure”, you can always change this later.
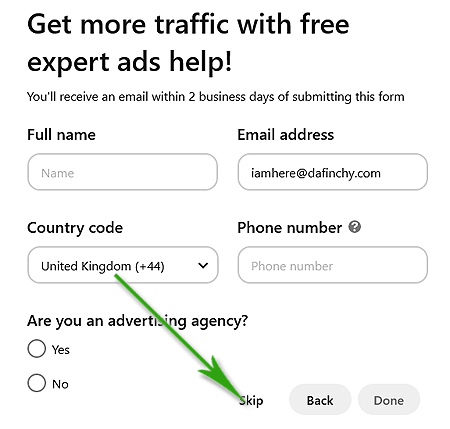
NEXT: GET MORE TAFFIC WITH FREE EXPERT ADS HELP:
Personally, I would choose the “Skip” option here, again as with some others you can choose this later.
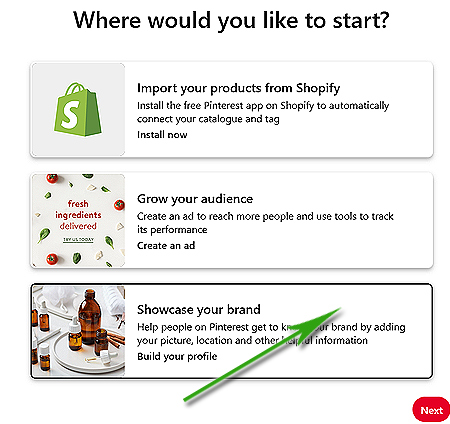
NEXT: WHERE WOULD YOU LIKE TO START?
It’s up to you here but I would choose “Showcase your brand” then click “next” as in my screenshot.
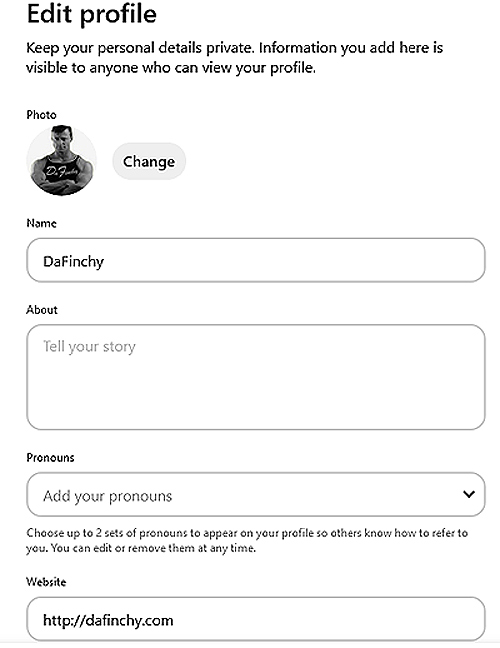
NEXT: EDIT PROFILE:
If this section doesn’t appear you can click the down arrow top right of your screen next to your profile and then choose “settings” this takes you to the same page and is important to be filled in as in screenshot.
In this “edit profile” section you can upload an avatar/image (small) if you already haven’t or change the one you have. You can leave the “Name” as it is or change it, add text to the “About” section which is where you can tell customers or general visitors what you do, can provide etc, at the time of me typing this you are allowed 500 characters.
Choose “pronouns” such as “he/him” etc.
Finally, you can (if you have one) add a link to your website or online shop/store.
NEXT: WHAT ARE YOU INTERESTED IN?
This one sometimes shows up here, before you fill in your profile or sometimes doesn’t show up at all.
Choose what interests you as it will fill your home feed then click “Meet your home feed” button as in screenshot.

NEXT: MAIN PROFILE (IMAGES):
Do the same as before, go top right of the page next to your profile, click the down arrow but this time just click your profile as in my screenshot.
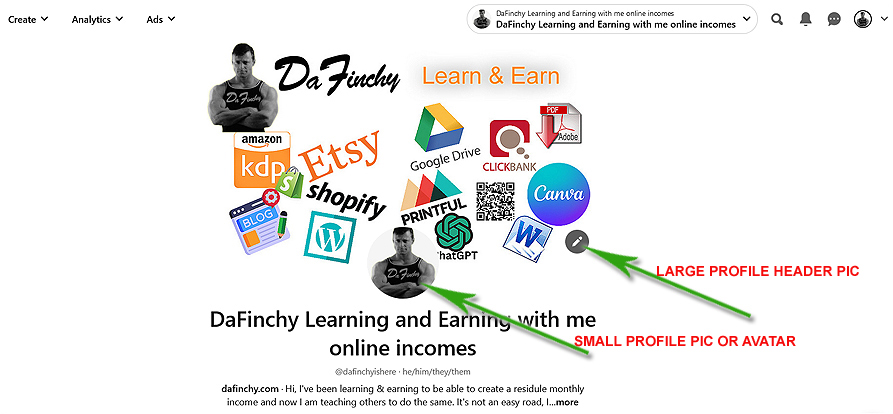
NEXT: ADDING PROFILE BANNER & PROFILE IMAGE/AVATAR:
On this page you can add a “Banner” and either add or change your profile image.
Click the relevant icons (sometimes show as a + sign) then choose an image from your computer/phone to upload.
The “profile pic” (small one) can be any size but the “Banner” needs to be 800 wide x 450 pixels height or, as Pinterest state “16:9 ratio” as shown in screenshot.
NEXT: FINAL PROFILE SETTINGS:
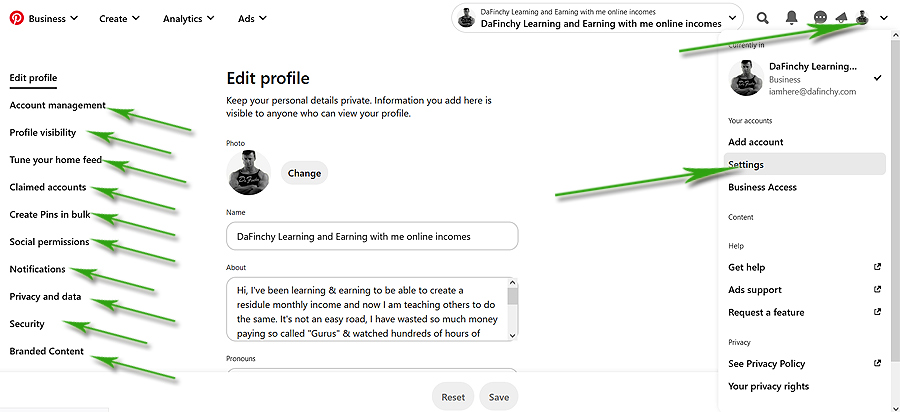
Go to top right of your screen, click the arrow next to your profile and choose “Settings”, on the left side you will see a list of options under the heading “Edit profile”, I suggest you go through these one at a time and either edit or fill in as much information as you can remembering to click “Save” after filling each in as in screenshot.
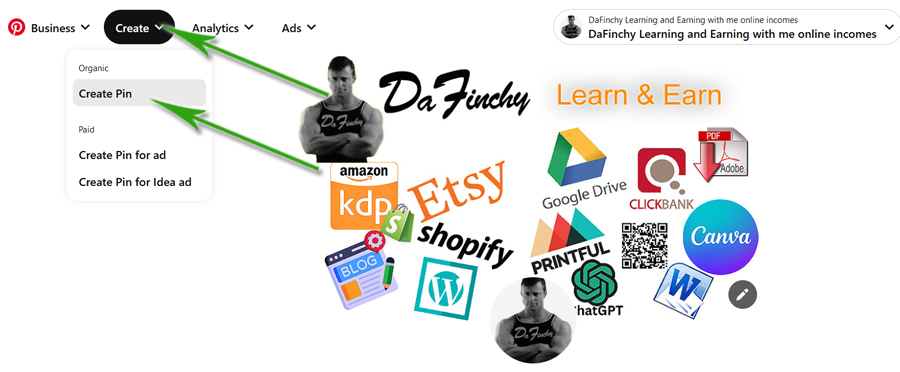
LAST: ALL DONE, NOW YOU CAN START ADDING “PINS” or FREE ADS:
Now that we have fully signed up and set up your Pinterest Business account you can start creating “Pins” which are basically FREE adverts, I will cover all this in another FREE tutorial which you will find on my website https://dafinchy.com.