HOW to sign up for & use a FREE Canva Account:
1st Go to Canva.com by clicking HERE. (NO this is not an affiliate link).
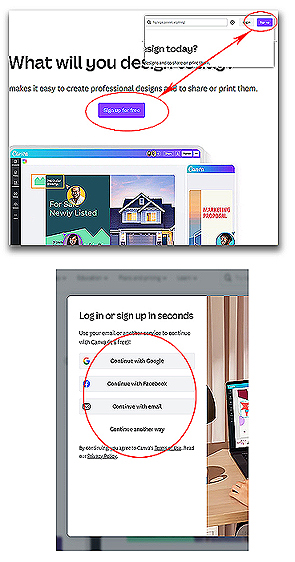
Click either “Sign Up” buttons, one appears in the centre of the page and the other top right. You can now choose to sign up using the following:
- Choose other way.
If you choose anything other than “email” you may be asked to log into that account.
If you have chosen “email” (I prefer this method) then just fill in the appropriate fields.
NEXT Click “GET STARTED” and follow on-screen instructions/questions, these will just be questions about how you would like to use Canva.
NEXT you should receive an email asking you to “CONFIRM ACCOUNT” just click the link in the email and BOOM, just like that YOU NOW HAVE A FREE CANVA ACCOUNT!
HOW TO LOAD A CANVA TEMPLATE YOU PURCHASED:
LOADING TEMPLATES IS EASY
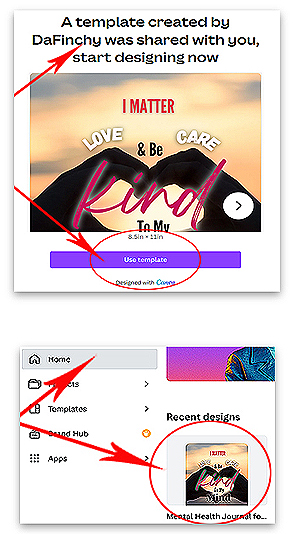
Whether you have purchased a template or are using a free one from another source the the process is the same, just click the link in your purchase and it will load in a browser just like the screenshot on the right.
NOTE: YOU WILL NEED TO BE LOGGED IN TO CANVA!
NEXT click “Use Template”.
This will open (load) the template directly into the Canva dashboard ready for you to edit.
QUICK TIP:
If you click “HOME” button/link on the Canva menu you will be able to see/access your template/design directly from there as in my screenshot on the right.
HOW TO USE THE CANVA TEXT/FONTS TOOLS:
PLEASE NOTE: Some fonts are only available in the PRO version & are depicted by this symbol. 
NOTE: ALL the FONT/TEXT tools are available in the bar as shown below in your Canva dashboard whilst designing, just remember to click on any text in your design FIRST to use these tools.

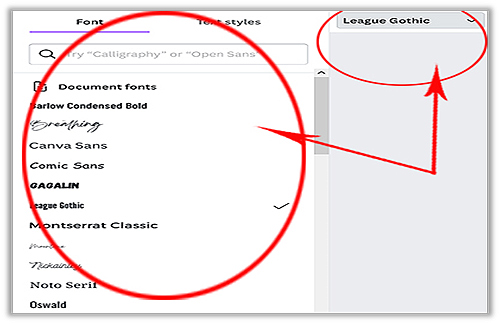
HOW TO CHOOSE A FONT:
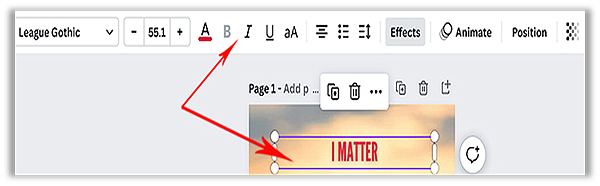
Highlight (Click on) any text then you can use the toolbar as shown in screenshot below.
NEXT CHOOSE A FONT:
Click onto the FONT menu (left top of screen) and choose your font from the list that appears as in screenshot below.
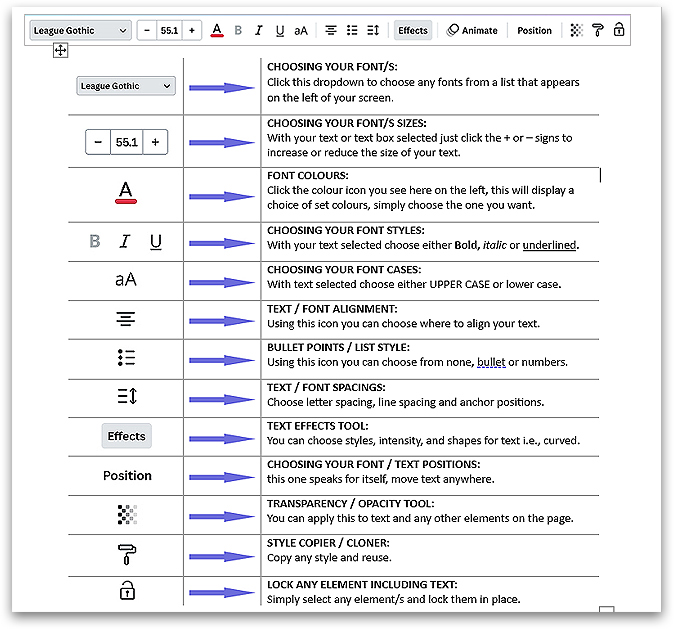
NEXT / FONTS CANVA CHECKLIST:
This one can look a little daunting at first but with my list here you will see I’ve named and arrowed all of them so you can effectively choose the correct ones as you go.
Don’t worry, yes it takes a little getting used to but you’ll pick it up in no time at all.
Play around with each one until you are happy you are getting to know them all.
We’ll have you happy fonting in no time.
UPLOADING & USING PHOTOS / IMAGES IN CANVA:
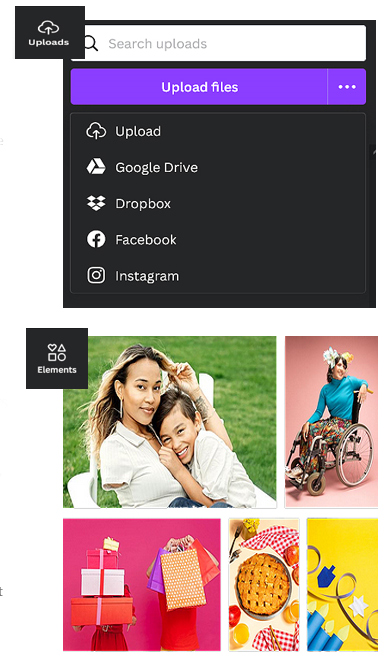
UPLOADING IMAGES IS EASY:
On the left hand Canva menu click the UPLOADS icon, it looks like this black square image as shown here.
You will now see the UPLOADS box as show here on the right.
You can upload photos, images from multiple places, your pc/laptop, Google Drive, Dropbox, Facebook & Instagram.
Just choose which is best for you to search for the images or photos you wish to upload.
CANVA PHOTO LIBRARY:
On the left hand Canva menu click the ELEMENTS icon, it looks like this black square image as shown here on the right.
Now scroll down until you see the word PHOTOS in the list, next to this on the right you will see “SEE ALL”.
Click the “SEE ALL” in photos to see a HUGE library of photos you can use in your projects.
To insert into a project just click any image and it will automatically be inserted then you can resize, move and so on.
GRIDS & INSERTING IMAGES IN CANVA:
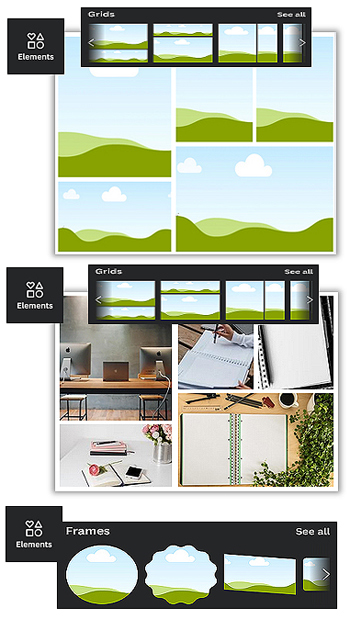
GRIDS & WHERE TO FIND THEM:
WHERE: Go to the left toolbar and click onto the ELEMENTS icon as show here on the right then scroll down until you see a section named GRIDS.
You will now see multiple types of grid you can use, simply click onto the one you wish to use and it will automatically be inserted into you project/page.
Click & drag it to where you want it to be.
GRIDS & HOW TO USE THEM:
Each section in the grid you have now placed onto your page can hold a single picture/photo.
NEXT go to either “ELEMENTS>PHOTOS” or “UPLOADS”, click and HOLD on an image and drag it into one of the sections in the grid that is on you page, it will automatically be inserted into that section and sized to fit.
Continue doing this until all the sections in your grid now have images/photos in.
FRAMES, LOCATION & HOW TO USE THEM:
FRAMES act pretty much the same as GRIDS so follow the exact same procedure as above to frames including location at ELEMENTS>FRAMES.
ELEMENTS LOCATIONS & USE:
Canva has a massive library of elements for you to use, edit, resize, flip and more.
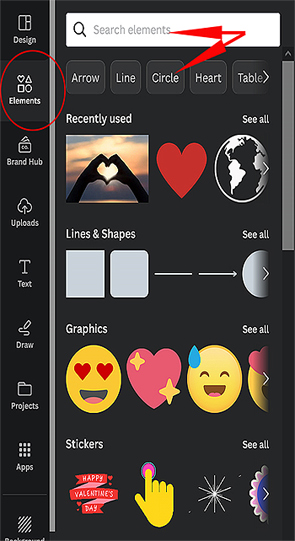
LOCATION: Go to the left toolbar and click onto the ELEMENTS tab, here you will be able to search in a few different ways.
If you have used any elements previously, they will appear under the heading “Recently Used”.
SEARCHING: You can type your search into the “Search Elements” top bar, you can also just click onto any buttons under the search bar which narrows your choices.
You can also scroll up, down, left, and right to view what is available or you can simply click “See All”.
HOW TO USE ELEMENTS:
When you find an element, you want to use just click onto it and it will be automatically inserted into your page, now you can resize, move it, rotate it, edit/change colours and more.
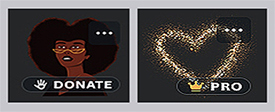
IMPORTANT: NOTE: Some elements are PRO ONLY as in screenshots here. Some request a DONATION to use.
TRANSPARENCY TOOL LOCATION & USE:
TRANSPARENCY USE:
The transparency tool can be used on any element in your project/document such as text, elements, images, photos, lines, shapes, and a lot more.
TRANSPARENCY TOOL LOCATION:
To view and use the transparency tool all you need do is click on ANY element on your page you wish to make transparent or faded and the toolbar will appear above with the transparency tool available to use.
TIP: When using the transparency tool, you can either use the slider to choose you transparency level or just type a number into the box.
STEPS & TIPS:
STEP 1: Click an element
STEP 2: Click the TRANSPARENCY tool.
STEP 3: Insert a number or use slider.
TIP: If adding text to an image or an icon then the transparency tool makes your text or icon stand out better as you can see in my screenshot on the right.
HOW TO LOCK ELEMENTS, TEXT & IMAGES:
LOCKING ELEMENTS, WHY?
Locking some elements will become second nature and is some time necessary to keep your projects & pages in order. Layers, backgrounds & some other elements sometimes need locking into.
3 WAYS TO LOCK ELEMENTS:
1: TOP MENU
Click on any element on a page and the top menu appears, to the right of this menu is a lock icon, simply click it to lock an element.
2: ABOVE EACH PAGE QUICK MENU
You will notice above each page in your document there is a grey menu with shortcuts to some functions, one being the lock icon, again just click it to lock a selected element.
3: ON ELEMENT CLICK LOCK MENU
When you click on any element you will notice a small white menu appear with 3 DOTS to the right, clicking these dots reveals a sub menu with the lock function at the bottom.
QUICK TIP: You can select MULTIPLE ELEMENTS by either clicking one then holding the SHIFT key down then clicking on others or, you can click and drag around multiple elements using your mouse.
Once all are selected you can lock them all at the same time.
TO UNLOCK: Just select elements then click the lock icon again, this will unlock them.

HOW TO CLONE / DUPLICATE PAGES:
DUPLICATING / CLONING A PAGE
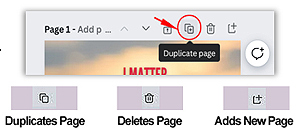
On the grey menu above each page, you will see 2 squares, one with a + sign in it. Click to duplicate page.
DUPLICATING / CLONING A PAGE IN GRID VIEW
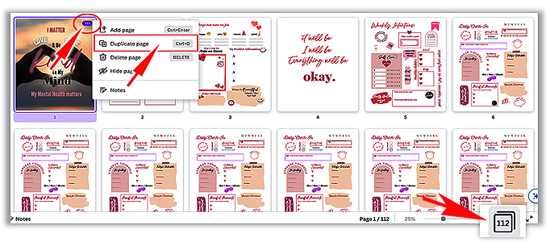
Switch to GRID VIEW using the icon at the bottom right of the screen in Canva. NOTE: You can also move/rearrange pages by clicking & dragging in grid view.
DUPLICATING / CLONING A PAGE DOT MENU / SUB MENU
Click on a page and you will see 3 dots in a purple box … appear, click these dots and a sub menu appears, you can now choose DUPLICATE PAGE from here.
QUICK TIP: You can duplicate a single page using your mouse, click the page, now tap Ctrl + C at the same time on you keyboard, release, place your cursor where you want the page duplicated then tap Ctrl + V on your keyboard to paste it in place.
NOTE: You can duplicate multiple pages at once. Click onto ONE page then hold the SHIFT key then click other pages and follow instructions in the QUICK TIP above.
HOW TO CLONE / DUPLICATE ELEMENTS:
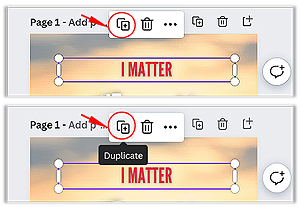
DUPLICATE AN ELEMENT
Click any element on a page and you will see a short WHITE menu appear, to duplicate the selected element click the + sign on the icon as shown below.
QUICK TIP TO DUPLICATE MULTIPLE ELEMENTS AT ONCE
Click MULTIPLE elements on a page by holding down the SHIFT key on your keyboard then keep clicking other elements you wish to duplicate remembering to keep holding down the SHIFT key then click the + sign to duplicate these elements.
HOW TO DOWNLOAD A SINGLE PAGE NOT ALL PAGES:
TO DOWNLOAD A SINGLE PAGE THAT IS STATIC (NO VIDEO OR ANIMATION)
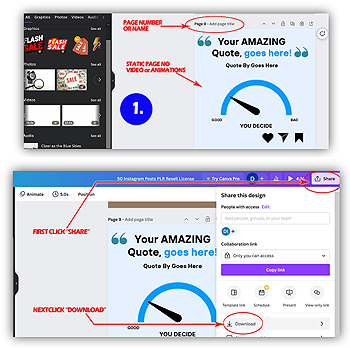
Scroll to the page you want to download (this one will be a static page), make a note of the PAGE NUMBER (or if you named it remember the name). As in screenshot 1.
NEXT: Click the “SHARE” button top right as in screenshot below then click “DOWNLOAD”.
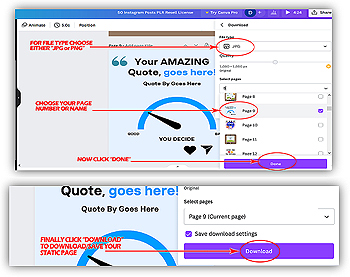
NEXT: You will see the choices as in screenshot below, 1st choose “File type” (for static pages JPG or PNG are best) then, choose your page number or name and then click “Done” button.
FINALLY: Click the “DOWNLOAD” button as in screenshot below to download/save your page.
BUT WHAT IF YOU HAVE AN ANIMATED PAGE WITH TRANSITIONS AND VIDEO?
No problem, keep reading…
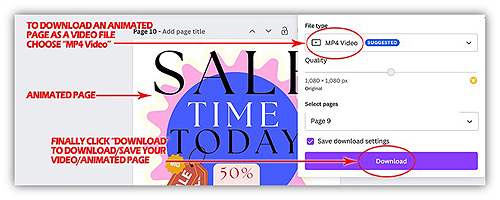
HOW TO DOWNLOAD A SINGLE ANIMATED PAGE (VIDEO):
FOLLOW ALL OF THE STEPS IN THE PREVIOUS SECTION (SAVING STATIC PAGE) but, when you get to the section “FILE TYPE” this time choose “MP4 Video” and you will then just click “DOWNLOAD” to save your animated page as a video.